3 Steps for Paint Preparation
If you’re planning a DIY paint project, you’ll need to take a few paint preparation steps to ensure the room is ready for painting. These are extremely important and will made the world of difference to the quality of the final result. Remember, prepare like a professional for professional results.
Let’s get started.
1. Remove Furniture from the Room
There’s no way we can achieve a top-quality paint result if we are tripping over coffee tables or leaning over lounges, and neither can you.
Remove all furniture from the room if possible. Not only will this make the painting process easier, but it will also protect your furniture from becoming damaged. If your furniture is too heavy to move, or if you have nowhere to move it to, you can push it to the centre of the room. Cover all the heavy ones like beds and move all the small decorations from books to any propagation station or even mirrors.
Lastly, refrain from returning your furniture to its original spot right away. Give your paint a good 24 hours to dry completely. It would be so frustrating to scrape your brand new paint!
2. Protect the Floor
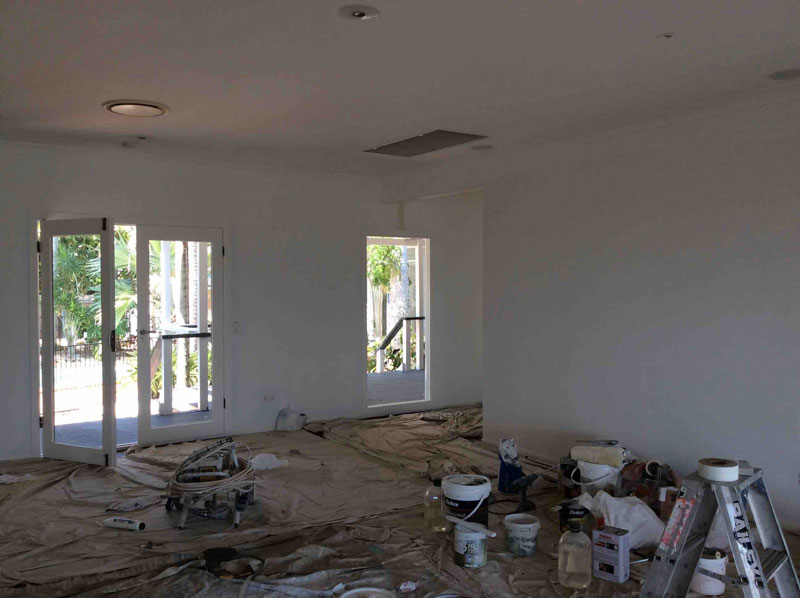
Unless you are planning on replacing it, you will need to cover your flooring in preparation for painting. Unfortunately, this will require a little more than a few sheets of newspaper under the paint tin.
Ideally, you will need to use professional drop cloths, or plastic sheets. While plastic sheets are cheaper, they are prone to puncturing and ripping, and they tend to wrinkle up under your feet while you paint.
We opt for heavy duty drop cloths, as you can see in the image of a major interior repaint project we did recently.

These cover the space completely, so you don’t need to worry about drops of paint ruining your gorgeous flooring.
3. Clean the Walls
Please, please, please do not skip this step. Many common paint problems are caused by small particles of dirt that get caught under the paint. These particles stop the paint from properly adhering to the surface, causing bubbles, blisters, and eventually peeling.
Not only will small particles of dirt cause blistering, but also smudges, smears and stains will show through. And if those stains are greasy at all (as they often are in the kitchen), they will stop the paint from sticking.
Usually, you can clean your walls using a mix of detergent and water, and a cloth. Just remember to do this a few days before you’re planning on painting, as you’ll need the walls to be completely dry before you proceed. For tougher stains, you can try using sugar soap, or a bleach solution.
Get Professional Painters
If all this just sounds like too much work, you can hire professional painters like us to do it for you. We prepare your rooms and surfaces to ensure your final result looks impeccable. If you’d like a detailed quote, please give us a call on 07 3829 5735 or fill out the form at the top of this page.

Have no reservations whatsoever in recommending Kraudelt Painting to anybody requiring paint needs. We are still raving and absolutely ecstatic with the transformation Kraudelt did to our home, not to mention the truly professional workmanship.
We will definitely be back for any future painting requirements :)) Thanks so much