3 Steps for Perfect Exterior Paint Preparation
 Is your exterior looking a little tired? Is your home in need of a refresh?
Repainting is a fantastic way to boost curb appeal and breathe new life into your house.
If you plan to tackle the job yourself, you’ll need to ensure you start with thorough exterior paint preparation. As the saying goes, if you fail to prepare, prepare to fail.
In this article we’ll walk you through the 3 key steps for exterior paint preparation. Follow these, and you’ll be on your way to a perfect finish.
Exterior Paint Preparation Step 1: Clean Your Surface
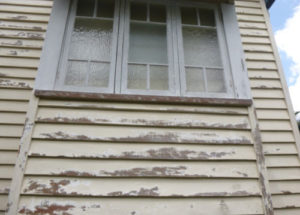
Before you even open a tin of paint, you must clean your surfaces. If you apply paint to a dirty surface, it will not adhere properly. This will result in cracked, blistered, and peeling paint.
 To clean your exterior, use a medium bristled hand brush to remove loose or peeling paint and dirt. You can use a household broom to clean hard-to-reach places. Remove caked on dirt with a scraper.
To remove fine dust and dirt, a mixture of warm water and detergent should do the trick. Rub down with a cloth or brush, rinse well, and allow to dry completely before proceeding.
During the cleaning process, you might come across areas affected by mould. Treat these with a fungicidal wash, being sure to follow the product’s instructions carefully.
Exterior Paint Preparation Step 2: Fix Any Damage
Exteriors are subject to harsh sunshine, wind, and rain, so there is bound to be some damage. You should repair all damage before you begin painting your exterior.
To repair small cracks and holes, purchase exterior filler or mortar. Ensure the area is clean and free of loose debris, and then fill the crack. Smooth the filler with a wet knife or pallet.
To repair cracks and holes deeper than 1cm, you might need to build layers of your exterior filler. Make sure each layer is dry before applying a new layer. Again, finish by smoothing the filler with a knife.
Finally, create an even surface by rubbing the repaired area with sandpaper.
 Exterior Paint Preparation Step 3: Seal and Prime
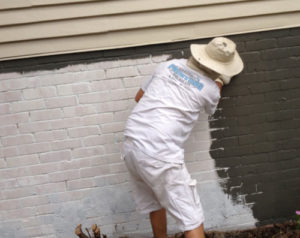
If you are painting a porous surface – such as brick or timber – you’ll need to seal and prime first. Otherwise, the paint will soak into the material resulting in an uneven finish.
Use a small paint brush to seal and prime edges and tricky-to-reach areas. Then, use a roller to prime the remaining larger areas.
Or Hire Professional Painters
Painting an exterior is a huge job that can take the inexperienced painter weeks and weeks. Speed up the process and ensure professional results by calling in the team at Kraudelt Painting. Get in contact for a fast and accurate quote. Call on 07 3829 5735 or fill out the form on this page.

 Exterior Paint Preparation Step 3: Seal and Prime